Most home repairs get ignored longer than they should. A slow drip under the sink, a door that lets cold air in, a toilet that runs longer than it should after flushing — none of these feel urgent at first. But small problems can slowly turn into higher bills, water damage, or expensive repairs.
The good news is that many useful home fixes are genuinely straightforward. You do not need trade experience, expensive tools, or a full weekend. This guide focuses on simple repairs and maintenance tasks that can help reduce waste, protect appliances, and prevent small problems from becoming bigger ones.
You will also see where to stop and call a professional, because saving money should never mean taking unsafe risks with wiring, gas lines, structural repairs, or major plumbing.
The best first DIY home fixes are replacing a worn toilet flapper, sealing drafts around windows and exterior doors, changing your HVAC filter, vacuuming refrigerator coils, and checking under sinks for slow leaks. These tasks are low-cost, beginner-friendly, and can help prevent waste or damage before it becomes expensive.
Why Small Repairs Are Worth Dealing With Now

The repairs that cost the most are not always sudden. A damp cabinet floor can turn into rot. A loose gutter can push water toward the foundation. A dirty dryer vent can make the dryer work harder and create a safety risk. These problems usually build slowly when small signs are ignored.
Doing simple maintenance early is not about making your home perfect. It is about catching small issues while they are still easy to handle.
The tools you actually need
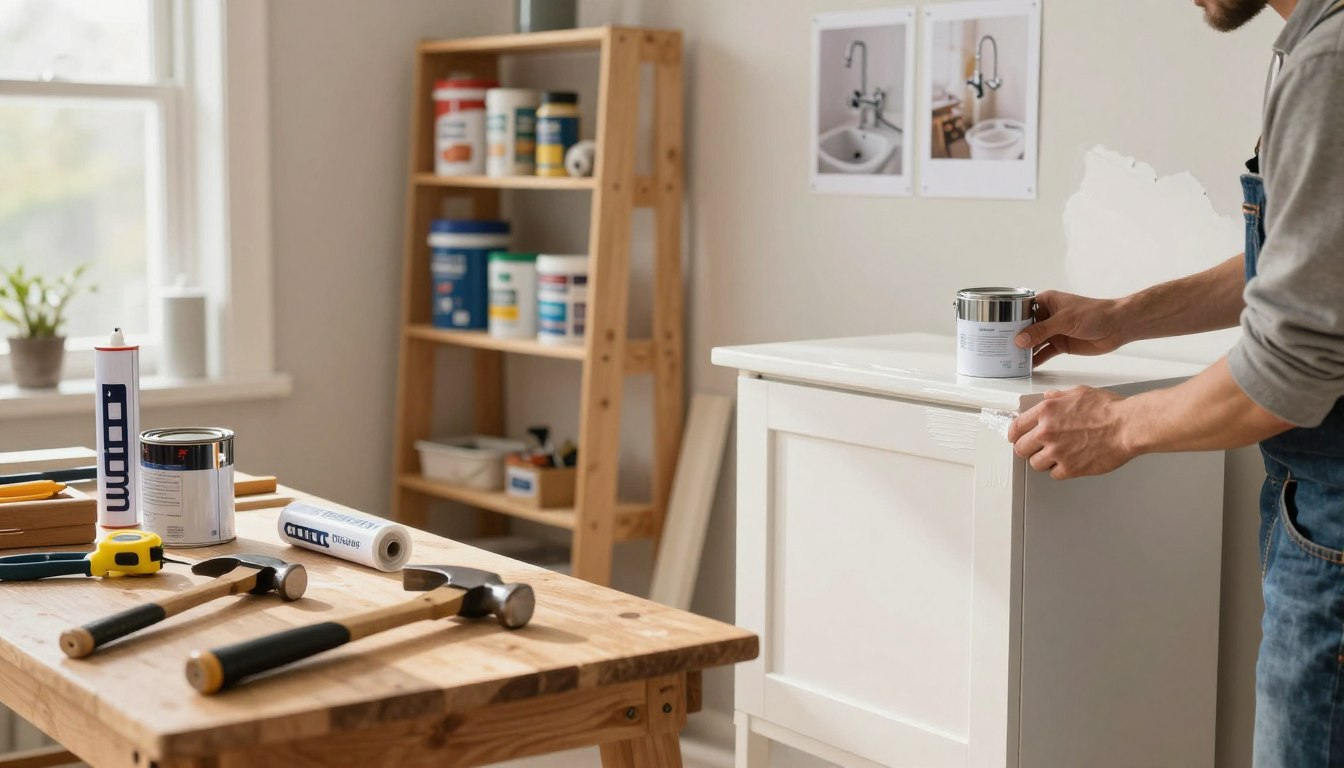
A tape measure, multi-bit screwdriver, adjustable wrench, claw hammer, and needle-nose pliers cover many common home repairs. Buy these first. Add to the kit only when a specific job calls for it. There is no reason to spend money on tools you might never use.
For storage, a pegboard or a few labeled plastic bins is enough. The goal is being able to find what you need quickly, especially when something is leaking or loose.
What to Try First
These five tasks have a good mix of low difficulty and real impact:
- Replace a running toilet’s flapper — a small part that often solves constant toilet running.
- Seal drafts at windows and exterior doors — foam tape, door sweeps, or caulk can reduce unwanted air leaks.
- Change your HVAC filter — if you cannot remember the last time it was changed, it is probably overdue.
- Vacuum refrigerator coils — this helps the fridge work without as much dust buildup around the coils.
- Check under sinks — catching a slow drip early is easier than fixing water-damaged cabinet flooring later.
Seal Drafts Around Windows and Doors

Gaps around windows and exterior doors let conditioned air escape and outside air enter. Your heating or cooling system then has to work longer to make up the difference. Sealing obvious gaps is one of the simplest ways to make a room feel more comfortable.
For general home efficiency guidance, you can also review practical advice from the U.S. Department of Energy’s Energy Saver guide.
How to find the drafts
Close a window or exterior door on a sheet of paper. If you can pull it out without resistance, the seal may be weak. You can also hold a lit incense stick near window frames and door edges. If the smoke bends sharply, air may be moving through a gap. This is easiest to notice on a cold or windy day.
Which material to use where
For movable parts, such as window sashes and door edges, use self-adhesive foam or rubber weatherstripping. These materials compress when the window or door closes. Clean the surface first so the adhesive sticks properly.
For fixed gaps where trim meets siding or a window frame meets the wall, caulk may be more appropriate. Remove loose old caulk first, apply a steady bead, and smooth it before it dries.
- If you rent: Foam tape and door draft stoppers are usually safer choices because they are removable. Avoid permanent caulk without permission.
- If your bill is high in winter: Check exterior doors first, especially the gap at the bottom of the door.
- If you have an older home: Work around the full window frame. Older frames often leak air in several small places, not just one obvious gap.
Fix a Leaky Faucet and a Running Toilet

A faucet that drips regularly can waste a surprising amount of water over time. A running toilet can waste even more, and because it may be quiet, it can go unnoticed for months. Both are often simple fixes using basic tools and inexpensive replacement parts.
Fixing a dripping faucet
Start by turning off the supply valves under the sink. Block the drain with a rag so small screws do not disappear. Remove the handle, loosen the packing nut with an adjustable wrench, and look at the part inside. Older compression faucets may need a new rubber washer. Cartridge-style faucets usually need the cartridge replaced.
If you are unsure which part you need, take the old part to a hardware store and match it carefully. Guessing can lead to extra trips and frustration.
Safety note: Confirm the valves are fully closed before taking anything apart. Turn the faucet on briefly to release pressure remaining in the line.
Stopping a running toilet
Lift the tank lid and watch what happens after you flush. In many cases, the flapper — the rubber piece at the bottom of the tank — is worn and no longer seals properly. Turn off the valve behind the toilet, flush to empty the tank, unhook the old flapper, and attach the new one.
If the toilet still runs after replacing the flapper, the fill valve, float, or chain length may be the issue. These parts are still basic, but if you are not sure what you are seeing, it is better to ask for help than keep guessing.
- If you rent: A running toilet is usually the landlord’s responsibility. Report it in writing with a photo. Ask before replacing parts yourself.
- If you have an older home: Old shut-off valves may not close fully. If water continues flowing after the valve is turned off, stop and shut off the main water supply or call a plumber.
Patch Walls and Touch Up Paint

Nail holes, scuffs, and small dents are normal in any home that has been lived in. They are also easy to fix, and the skill is especially useful for renters who want to leave a place in good condition.
Filling small holes
Press the edges of the hole slightly inward with the handle of a putty knife so nothing sits above the wall surface. Swipe a small amount of lightweight spackle over it, let it dry completely, then sand it flush with a fine-grit sanding block. Wipe away dust before painting.
Paint touch-ups that blend better
Flat and matte paint usually touch up more easily than glossy finishes. Eggshell, satin, and semi-gloss finishes are trickier because a brushed patch may leave a visible sheen difference. A small foam roller can help feather the paint outward so the repair blends better.
Useful note: Spackle is porous and can absorb paint differently than the surrounding wall. A quick coat of primer over the patch before painting helps the finish look more even.
Cabinet Doors and Hardware
A sagging cabinet door or loose drawer pull can make a kitchen feel older than it is. These fixes are usually simple and can improve how the room looks and works day to day.
Cabinet door that will not hang straight
Cabinet doors often sag when hinge screws loosen over time. Tighten the screws on the hinge plate with a manual screwdriver. Avoid using a power drill for this small job because it can strip the wood if you apply too much force.
If the door is still out of alignment, look for adjustment screws on the hinge arm. Turning these screws can shift the door slightly up, down, left, or right until it sits correctly.
Replacing knobs and pulls
Before buying new hardware, measure the center-to-center distance between the screw holes on existing drawer pulls. New hardware should match this measurement unless you are prepared to drill new holes and fill the old ones.
Appliance Maintenance That Prevents Early Problems
Appliances often work harder when airflow is blocked or parts are covered with dust. Refrigerator coils, dryer vents, and HVAC filters are easy to forget because they are not visible every day. Checking them regularly can help appliances run more efficiently and reduce the chance of avoidable problems.
Refrigerator coils
Condenser coils on the back or underside of the refrigerator release heat as part of the cooling cycle. When they are covered in dust or pet hair, the compressor may run longer. Unplug the fridge, remove the base grille if needed, and vacuum the coils carefully with a brush attachment.
For many homes, doing this every six months is a reasonable habit. If you have shedding pets or a dusty kitchen, check more often.
HVAC filter
A clogged filter restricts airflow and can force your furnace or air conditioner to work harder. For general heating and cooling maintenance guidance, you can review basic advice from the U.S. Department of Energy’s air conditioner maintenance guide. Change your filter every 30 to 90 days, depending on your system, dust level, and whether you have pets. Write the date on the filter with a marker when you install it so you do not lose track.
Dryer vent
Lint buildup in a dryer vent can reduce airflow and create a safety risk. Disconnect the vent hose from the back of the dryer once a year, clear it out, and make sure the exterior flap opens freely when the dryer runs.
If clothes are taking longer to dry than usual, check the vent before waiting for your scheduled cleaning. Restricted airflow is a common cause.
Safety note: If your dryer vent hose is flexible plastic, consider replacing it with rigid or semi-rigid metal ducting. Plastic can trap lint more easily and is not ideal near heat.
Low-flow fixtures and LED bulbs
A WaterSense-labeled showerhead can reduce hot water use while still keeping normal comfort. Replacing a sink aerator is also simple and usually takes only a few minutes. Swapping old bulbs for LEDs in your most-used rooms can also reduce electricity use over time.
For more related ideas, see our guide on reducing electricity usage at home.
Catching Water Problems Before They Get Expensive
Many water problems start as slow leaks that stay hidden for weeks. Under sinks, behind washing machines, around toilets, and near gutters are common places to check. A few minutes of inspection every few months is much easier than dealing with rot, mold, or damaged flooring later.
Under-sink checks
Clear out the cabinet under your kitchen and bathroom sinks. Use a flashlight to inspect the P-trap, supply lines, and shut-off valves. Mineral crust, water stains, or soft cabinet flooring can be signs of a slow leak.
If a slip nut is loose, tighten it gently by hand. If the leak continues or the parts look cracked or brittle, replace the worn part or call a plumber.
Gutters and downspouts
Gutters that overflow can push water toward the foundation instead of away from the house. Clear gutters in late spring and again after leaves fall. Make sure downspout extensions direct water away from the foundation.
Safety note: Do not lean a ladder against the gutter itself because it can bend or pull away. Use a stable ladder position, avoid working alone when possible, and do not climb if the ground is wet or uneven.
- If you rent: Under-sink leaks are usually the landlord’s responsibility. Report them with a photo and keep a written record.
- If you have an older home: Older fittings can dry out, crack, or loosen. Replace worn parts before they fail completely.
- If your home has a basement: After heavy rain, check the floor and walls for seepage. Moisture in the same spot repeatedly may mean gutters, downspouts, or grading need attention.
What to Avoid
- Using a power drill on cabinet hinge screws. It is easy to over-tighten and strip the wood. Use a manual screwdriver for better control.
- Applying fresh caulk over old caulk. The new layer may not bond well. Remove loose or failing caulk first.
- Skipping the supply valve shutoff before plumbing work. Always shut off water and release pressure before taking parts apart.
- Using flexible plastic duct behind the dryer. It can trap lint and is not the safest option near heat. Metal ducting is a better choice.
- Painting a spackled patch without priming first. Spackle can absorb paint differently and leave a visible patch.
- Doing electrical panel work, gas line repairs, structural work, or main sewer line plumbing yourself. These jobs require proper training, permits, and licensed professionals.
A Maintenance Checklist to Work Through
Do these tasks once, then build the time-based ones into a seasonal habit.
- ☐ Test exterior doors and windows for drafts using the paper method
- ☐ Apply weatherstripping or caulk where you find clear gaps
- ☐ Check the toilet flapper if the toilet runs after flushing
- ☐ Look under kitchen and bathroom sinks for drips, stains, or soft flooring
- ☐ Change the HVAC filter and write the date on it
- ☐ Vacuum refrigerator coils
- ☐ Clear the dryer vent hose and confirm the exterior flap opens freely
- ☐ Clean gutters and check downspout direction twice a year
- ☐ Tighten loose cabinet door hinges by hand
- ☐ Replace old bulbs with LEDs as they burn out
Final Thoughts
The best DIY home fixes are usually not dramatic. They are small, practical jobs that stop waste, prevent damage, or help your home work better. A clean filter, a sealed draft, a fixed toilet flapper, or a dry cabinet floor may not look exciting, but these are the kinds of details that keep a home in better condition.
Start with the simple checks first. If a job feels unsafe, requires special knowledge, or keeps coming back after you fix it, that is the point where calling a professional can save more money than guessing.
Common Questions
Will DIY repairs affect my home’s resale value?
Routine maintenance done correctly can support home value because it shows the property has been looked after. Poor DIY work can do the opposite, especially if it involves plumbing, wiring, structural repairs, or visible finish work. The tasks in this guide — patching, sealing, cleaning, basic plumbing checks, and simple maintenance — are low-risk when done carefully.
How much should I budget for home maintenance each year?
A common rule is to set aside a small percentage of your home’s value each year for maintenance, but the exact amount depends on age, climate, and condition. Newer homes may need less at first, while older homes or homes with aging systems often need more attention.
Which repair has the most immediate effect on a high utility bill?
Sealing obvious drafts, changing a clogged HVAC filter, and switching frequently used lights to LED bulbs are good first steps. If you only have an hour, check exterior door gaps and the HVAC filter first because both are quick and easy to inspect.
When should I stop and call a professional?
Stop when the job needs a permit, involves the main electrical panel, touches gas lines, affects load-bearing walls, or involves major plumbing. Also call a professional if the same problem keeps returning, such as recurring leaks, mold, or breakers that keep tripping.
Can renters do these repairs?
Many small tasks are renter-friendly, such as adding foam weatherstripping, checking for leaks, changing removable filters, or patching small nail holes before moving out. For anything involving fixtures, switches, plumbing parts, or permanent wall changes, check your lease and ask your landlord first.
How often should I clean coils and check the dryer vent?
For refrigerator coils, every six months is a reasonable habit for many homes, and more often if you have pets or heavy dust. For the dryer vent, check at least once a year. If clothes take longer to dry than usual, check sooner.