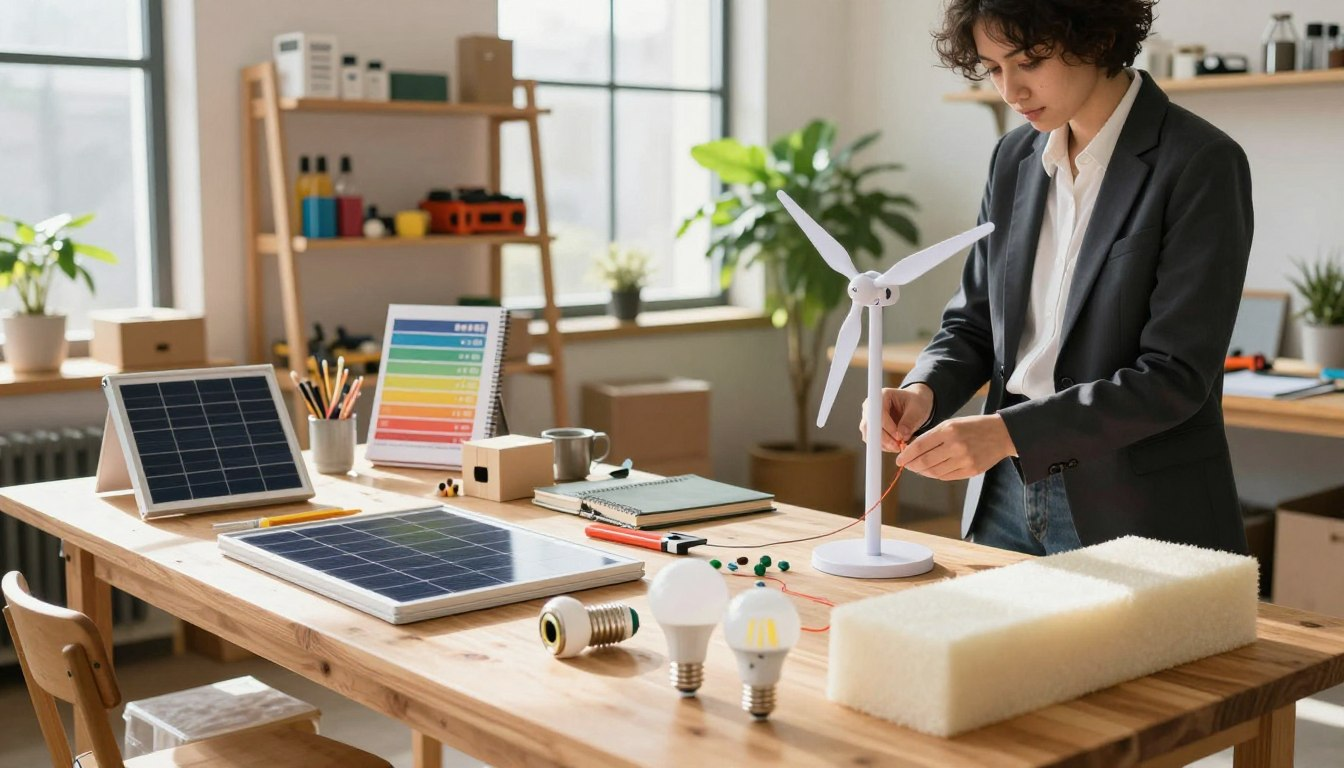
A lot of home energy waste comes from things that are easy to overlook — a door that does not seal properly, a water heater set higher than needed, or electronics drawing power all night when nobody is using them. None of it feels urgent, but small waste can add up over time.
The projects here are realistic weekend tasks for many homes. Some are very low-cost, while others depend on the materials you choose and the condition of your home. We will note where renters should check with a landlord first, and where a professional is the safer call.
If you only have a couple of hours, start with three simple projects: check your water heater temperature, add a smart plug or switched strip to your TV setup, and seal the gap at the bottom of exterior doors with a door sweep. These are practical first steps because they are easy to understand, low-disruption, and useful in many homes.
What to Try First
If this is your first time tackling home energy projects, this order makes the most practical sense:
- Seal drafts at exterior doors and windows — quick, low-cost, and useful for heating and cooling comfort.
- Check your water heater temperature — many homes can use a lower setting safely, but always consider household needs first.
- Check your thermostat schedule — if you already have a programmable thermostat, make sure it is actually being used before buying a new one.
- Swap incandescent bulbs for LEDs — start in the rooms you use most; no tools needed.
- Cut standby power from your entertainment center — a smart plug or switched strip takes only a few minutes to set up.
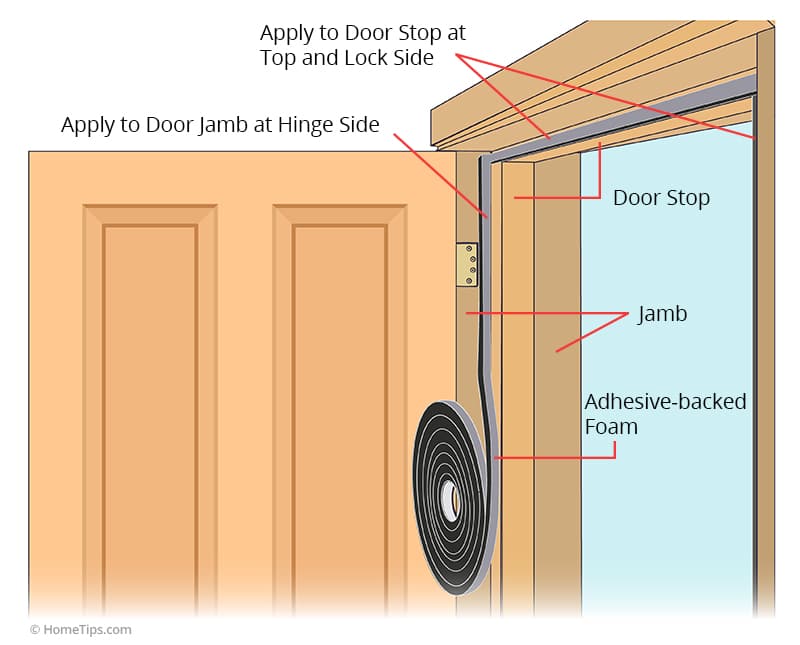
Project 1: Seal Drafts Around Doors and Windows
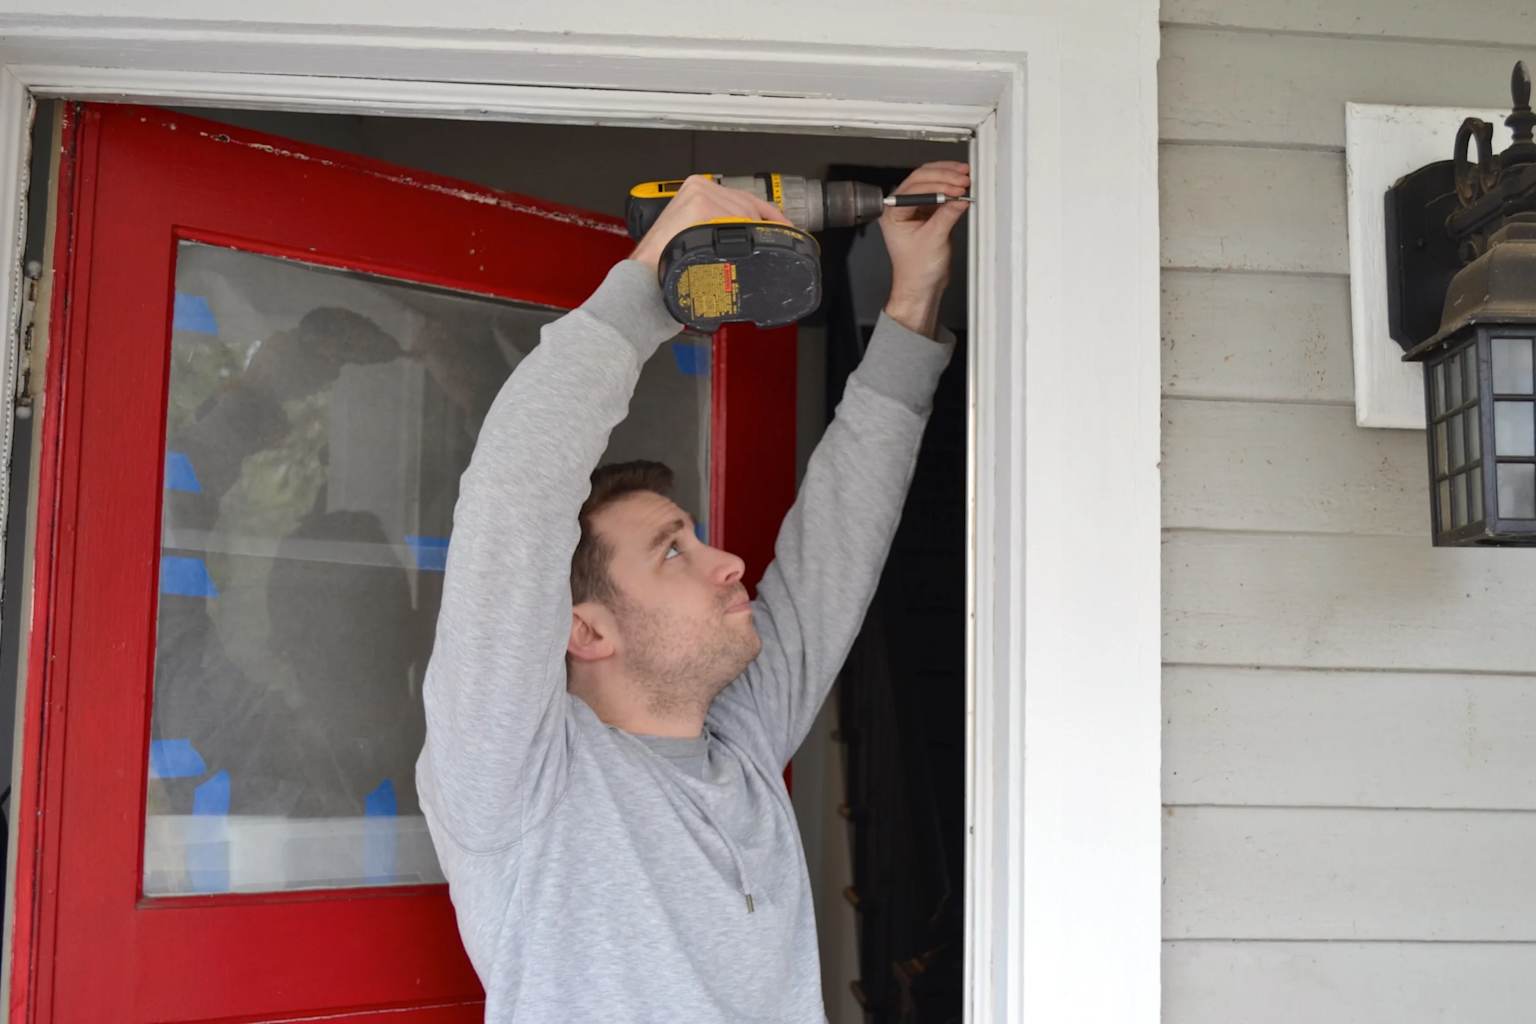
Gaps around exterior doors and windows let conditioned air escape and outside air enter. Your heating or cooling system then has to work longer to make up the difference. Sealing obvious gaps is one of the simplest ways to make a room feel more comfortable.
For general home efficiency guidance, you can also review practical advice from the U.S. Department of Energy’s Energy Saver guide.
Weatherstripping a door
Clean the door jamb first because adhesive will not bond well to dust or grease. Measure and cut the strip before removing the backing. Press it firmly along the top and sides of the frame. Close the door to test the fit. You should feel light resistance without forcing the door shut.
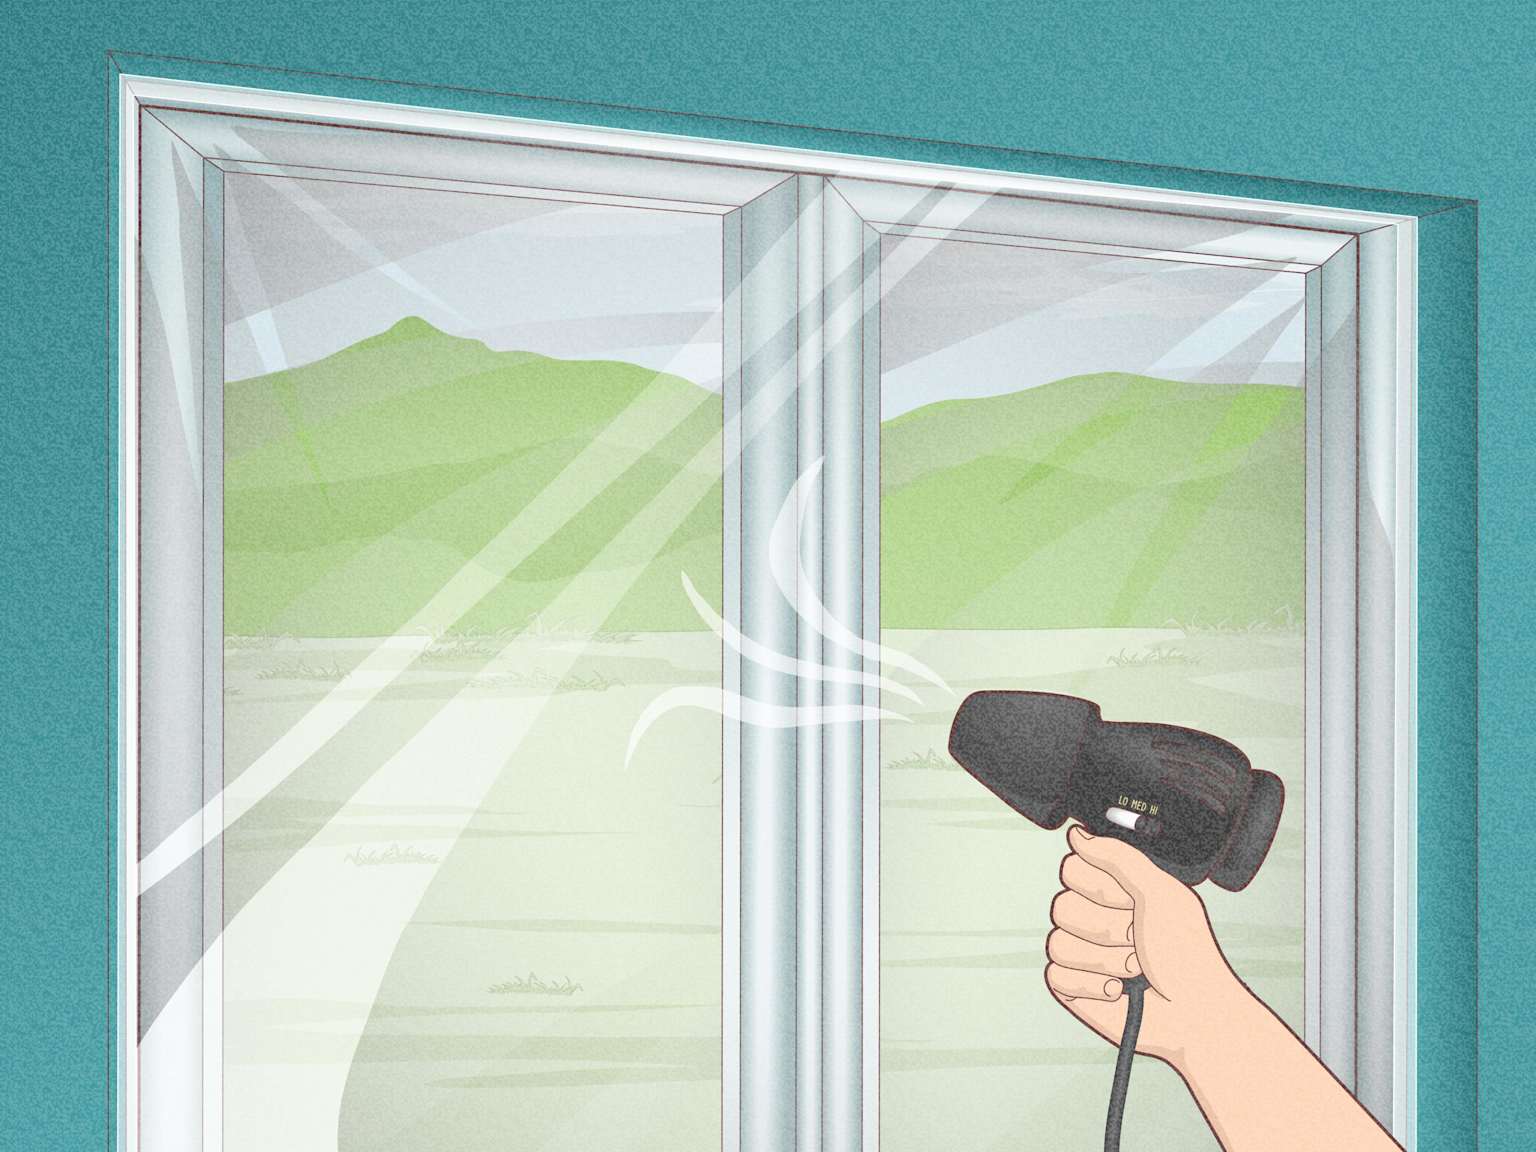
Window insulation film
Window insulation film can help in cold rooms with older windows. Apply double-sided tape around the interior frame, press the film to the tape, and shrink it smooth with a hairdryer. Once installed neatly, it is usually much less noticeable than people expect.
Caulking exterior gaps
Remove old, cracked caulk around window frames and door trim with a stiff putty knife. Let the surface dry fully, then run a bead of exterior-grade caulk along the joint. Smooth it before it skins over. This helps reduce air leaks and can also reduce water entry around the frame.
- If you rent: Foam tape and door draft stoppers are removable and safe for most leases. Avoid permanent caulk without landlord permission.
- If your bill spikes in winter: Start at the bottom of exterior doors. That gap is often one of the easiest draft points to fix with a door sweep.
- If you have an older home: Old window frames may leak air in several small places. Work around the full perimeter, not just one obvious edge.
Project 2: Improve Attic Floor and Basement Rim Joist Insulation
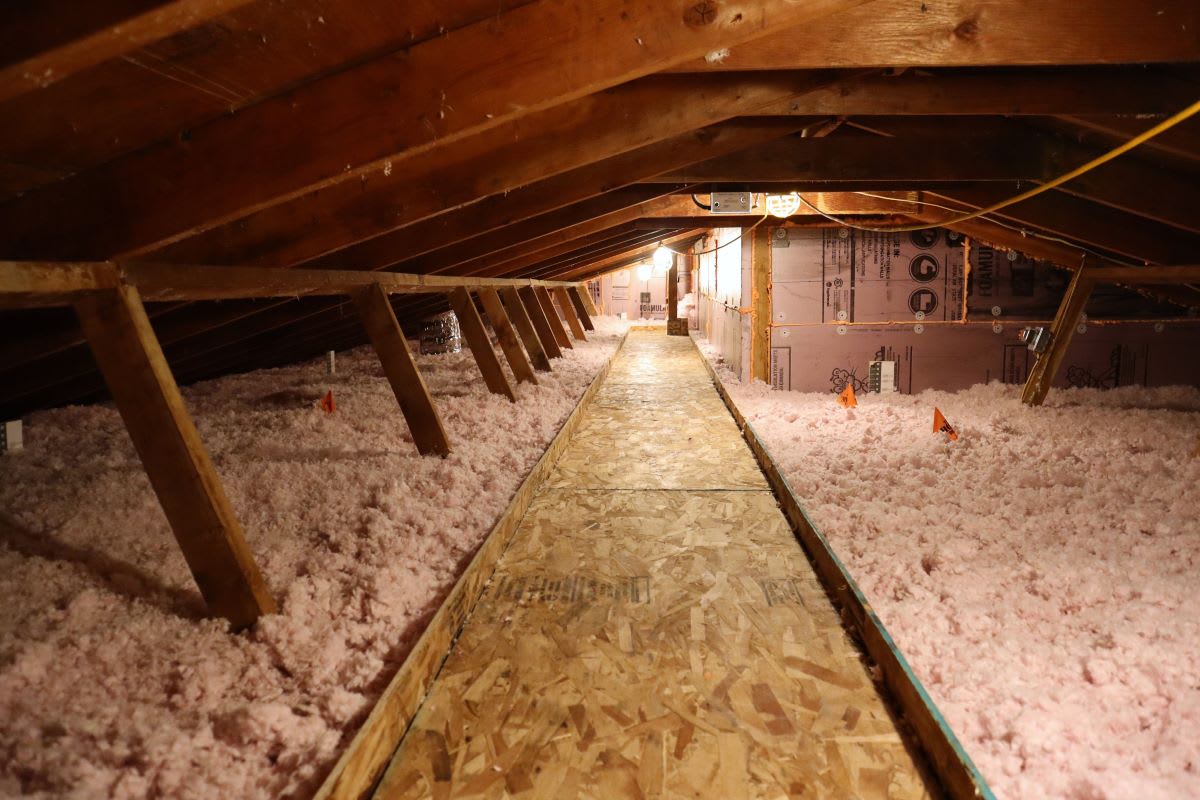
The attic floor and basement rim joists can be important heat-loss areas in many homes. Improving them does not always require a major renovation, but it does require careful preparation and the right safety gear.
Attic floor joists
Before adding insulation, look for gaps around plumbing penetrations, light fixtures, and the attic hatch. Seal obvious air leaks first with suitable caulk or foam. Insulation slows heat transfer, but it does not stop airflow by itself. Once gaps are sealed, lay insulation carefully between floor joists without compressing it.
Safety note: Wear a respirator, safety glasses, gloves, and long sleeves when handling fiberglass. Work in short sessions, especially in warm weather, because attic temperatures can become unsafe.
Basement rim joists
The rim joist runs along the top of the foundation wall where the house frame begins. In some homes, this area feels cold or drafty. Rigid foam board cut to fit each joist bay can help, especially when the edges are sealed properly with compatible foam or sealant.
Pipe and wire penetrations
Anywhere a pipe, wire, or duct passes through a wall or floor into an unheated space can become an air leak. Small gaps can often be sealed with the right foam or caulk. Avoid sealing around anything hot or unsafe for foam, and follow product instructions carefully.
- If you rent: Attic and basement insulation are usually building improvements. Ask your landlord before doing anything permanent.
- If you have an older home: Check what insulation already exists before buying materials. Some areas may need air sealing more than more insulation.
- If your bill is high in winter: Start with the easiest visible air leaks first. Sealing gaps is often more practical than adding insulation everywhere at once.
Project 3: Set Up Your Thermostat Properly
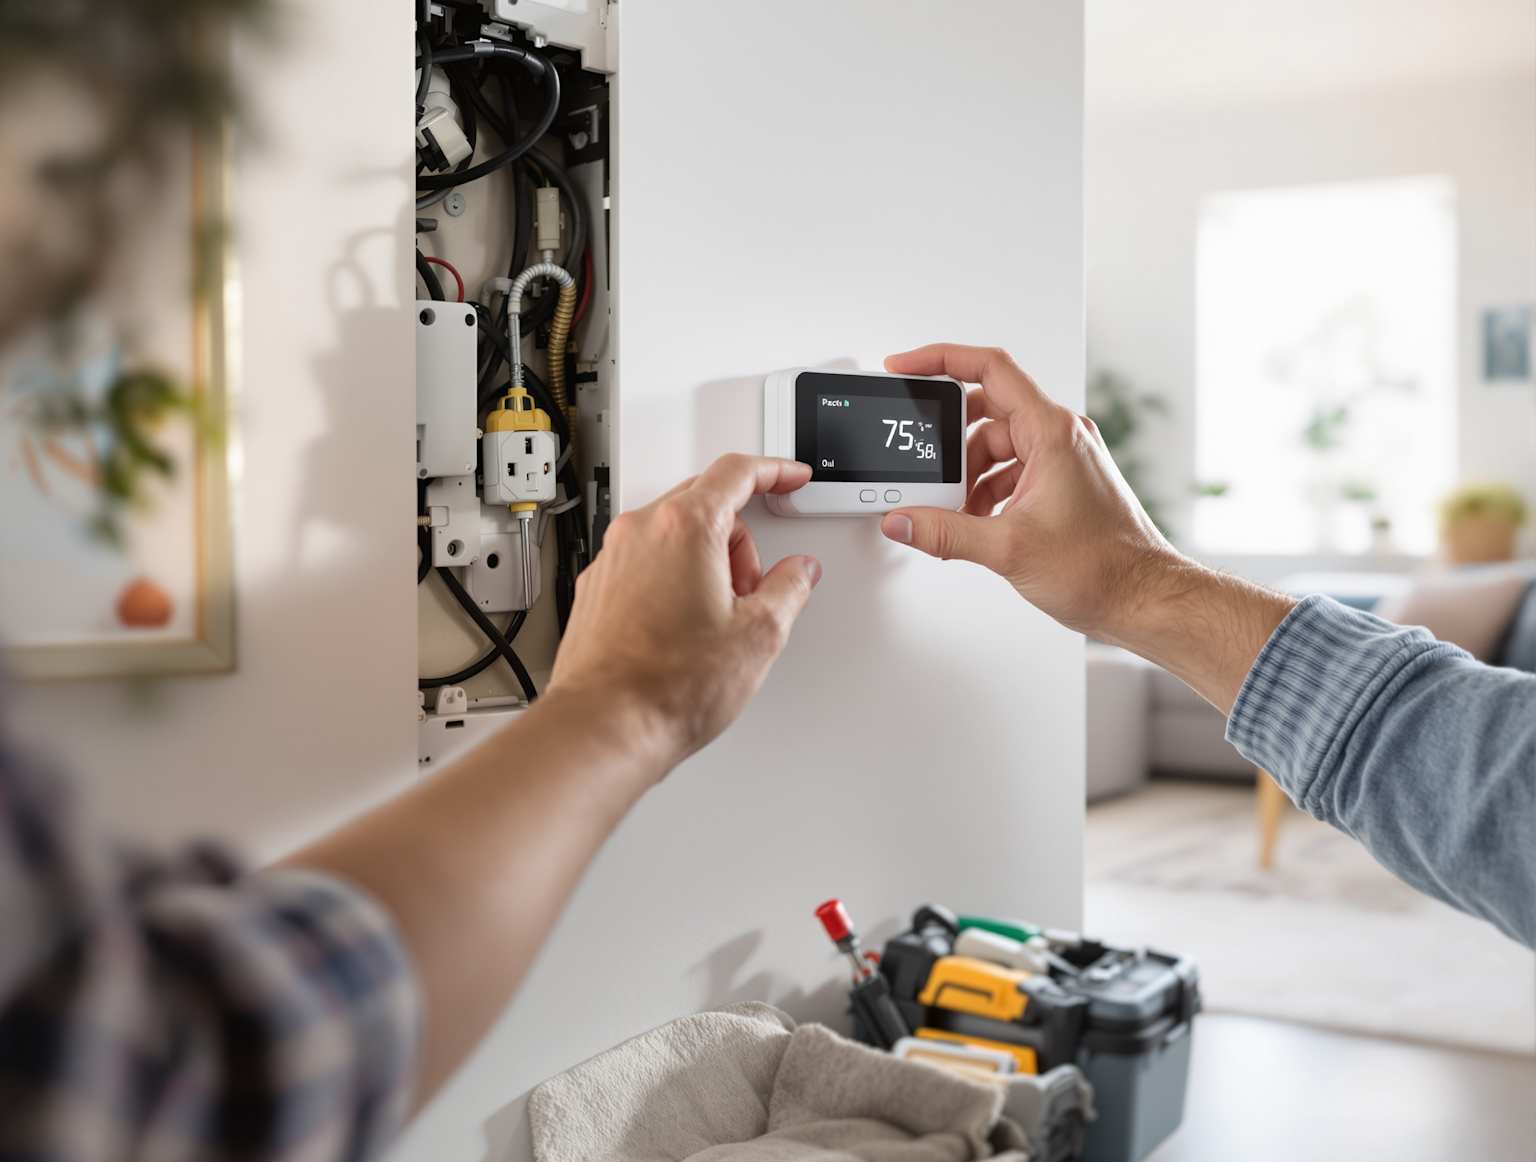
Heating and cooling are often among the largest energy costs in a home. A thermostat running the same temperature all day, even when nobody is home, can create unnecessary energy use.
If you already have a programmable thermostat
Check whether the schedule is actually set up. Many programmable thermostats get installed and left on manual mode because the schedule feature feels confusing. Spending a few minutes setting sleep and away periods may help without buying anything new.
Installing a smart thermostat
If your current thermostat is old or unreliable, a smart thermostat may be worth considering. Turn off the HVAC system at the breaker first, photograph the existing wiring before disconnecting anything, and match each wire to its labeled terminal. Follow the manufacturer’s setup instructions carefully.
Before buying: Check compatibility. Many smart thermostats work with standard forced-air systems, but some may not support electric baseboard heaters, boilers, heat pumps, or multi-stage systems. The manufacturer’s website usually has a compatibility checker.
Using it effectively
The savings come from the scheduling features, not from simply owning the device. Set practical temperatures for sleep hours and times when the home is empty. If the thermostat supports location-based features, use them only if they fit your routine and privacy comfort level.
- If you rent: Ask your landlord before replacing the thermostat. Do not change wiring without permission.
- If you live in a small apartment without central HVAC: A smart plug on a portable heater or window AC may give useful scheduling control without a permanent change.
Project 4: Replace Bulbs and Upgrade Switches Carefully
Swapping old incandescent bulbs for LED bulbs requires no tools and is one of the easiest upgrades. Start in the rooms you use most, such as the kitchen, living room, bathroom, hallway, and outdoor fixtures that stay on for long periods.
Motion sensor switches
Motion sensor switches work best in hallways, stairwells, laundry rooms, garages, and other spaces where lights often get left on. They are useful, but they involve wiring, so only install them if you are comfortable working safely with household circuits.
Dimmer switches
Dimmers can reduce electricity use when you lower the brightness, but they need compatible bulbs. Before buying, confirm your LED bulbs are labeled “dimmable.” Incompatible bulb and dimmer combinations may flicker or fail early.
Safety note: Always turn off the correct breaker and verify with a non-contact voltage tester before touching any wires. If your home has aluminum wiring, a fuse box, or anything unusual, have an electrician handle the work.
Project 5: Three Simple Water Heater Fixes
Water heating is often one of the larger energy uses in a home. A few simple changes can reduce waste without replacing the whole system.
Check the temperature setting
Many water heaters are set higher than needed for everyday use. A setting around 120°F is commonly recommended for many households because it can reduce energy use and lower scalding risk. However, household needs vary, so consider your appliance requirements, health needs, and manufacturer guidance before changing the setting.
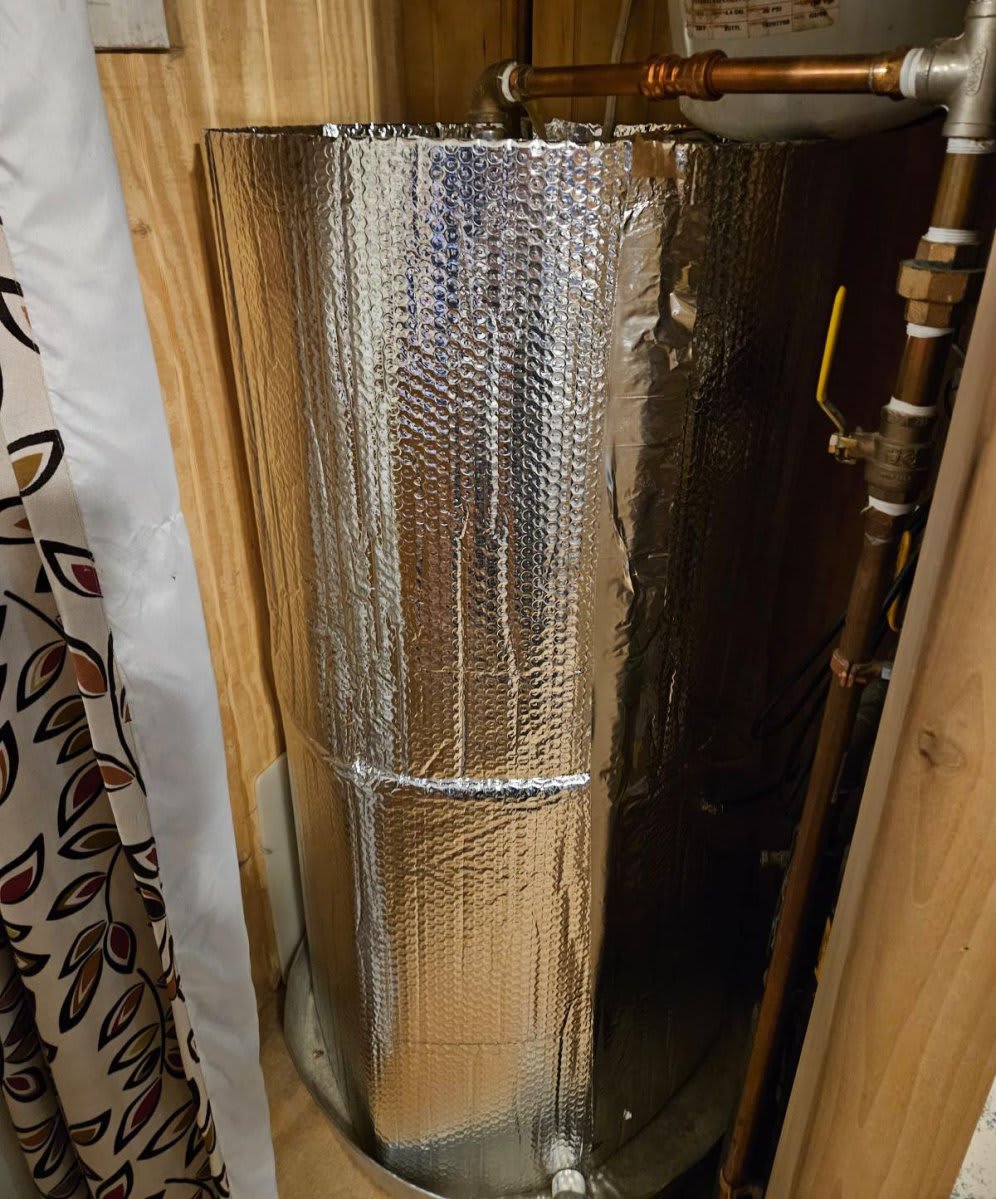
Insulation blanket
If the outside of your water heater feels warm to the touch, it may be losing heat to the surrounding air. An insulation blanket can help on some older tanks. For gas heaters, do not cover the flue, burner access panel, or pressure relief valve. For electric heaters, follow the kit instructions carefully.
Worth knowing: Newer water heaters often have sufficient built-in insulation already. If the tank’s outer shell feels close to room temperature, a blanket may not help much.
Low-flow faucet aerators
Aerators screw onto many existing faucet spouts. They reduce the amount of water flowing from the tap while keeping the stream usable for everyday tasks. Less hot water used at sinks can reduce demand on the water heater throughout the day.
- If you rent: Ask before adjusting a shared water heater. Faucet aerators are usually renter-friendly because they are removable.
- If you have an older home: Older tanks with minimal insulation may benefit more from a blanket than newer tanks.
- If you have young children or older adults at home: Lowering scalding risk may be as important as energy savings.
Project 6: Cut Standby Power from Electronics
Devices that are “off” but still plugged in may continue drawing small amounts of power. This is sometimes called standby power or phantom load. TVs, gaming consoles, desktop computers, printers, chargers, and anything with a remote receiver or digital clock can contribute.
Across a whole home, standby power can add up over time, especially when several devices stay plugged in all day and night.
A smart power strip for an entertainment center can make it easier to shut off devices that do not need power overnight. For a home office, a basic switched strip with one button may be enough.
Safety note: Do not plug space heaters or high-draw appliances into smart plugs unless the plug is clearly rated for that load. Check the wattage limit on the plug’s label first.
- If you live in a small apartment: A smart plug on the TV setup and unplugging unused chargers are easy starting points that require nothing permanent.
- If you rent: Smart plugs and power strips are portable, need no installation, and move with you.
Project 7: Better Window Coverings
Windows can lose heat in winter and allow heat in during summer. The right coverings can improve comfort without permanent changes, which makes this one of the more renter-friendly projects here.
Cellular honeycomb shades
Cellular shades use a honeycomb structure that traps air between the window and the room. Double-cell designs usually insulate better than single-cell designs. They can be useful in bedrooms, living rooms, and cold windows that make a room uncomfortable.
Thermal curtains in winter
Heavy thermal curtains can reduce the cold feeling near windows at night. Close them around sunset rather than waiting until bedtime. During sunny winter days, open curtains on the sun-facing side to let natural warmth in.
Reflective film for summer
Solar-control window film can reduce heat coming through south- and west-facing windows during summer. DIY kits are widely available, but renters should check the lease first because some films may affect glass warranties or leave residue if removed poorly.
- If your bill is high in summer: Focus on south- and west-facing windows first because they usually receive the most afternoon sun.
- If you rent: Curtains and removable shades are usually safer than adhesive film. Check your lease before applying window film.
Project 8: Basic HVAC Maintenance
Your heating and cooling system is often one of the largest energy users in the home. Many routine maintenance tasks are simple, but they still require care and regular attention.
Air filter
A clogged filter restricts airflow and can make the system work harder. Check it monthly and replace it when it looks gray or dirty. Many homes replace filters every one to three months, but the right timing depends on dust, pets, system use, and filter type.
Outdoor condenser unit
Turn off the unit at the breaker before doing anything near it. Gently rinse debris from the exterior coil fins with a garden hose, and keep plants trimmed away from the unit so airflow is not blocked. Do not bend or crush the fins.
Vents and ductwork
Walk through each room and check that furniture, rugs, and curtains are not blocking supply or return vents. In basements, crawlspaces, or attics, check visible duct runs for gaps or disconnections. Seal accessible gaps with metal foil HVAC tape, not regular duct tape.
Safety note: Turn the system off at both the thermostat and the breaker before cleaning the condenser or handling ductwork near the air handler. If you see damaged wiring, refrigerant lines, or unusual noises, call an HVAC technician.
What to Avoid
- Buying a smart thermostat without checking compatibility. Not all systems are supported. Use the manufacturer’s compatibility checker before purchasing.
- Adding insulation before air sealing. Insulation slows heat transfer, but air sealing often needs to come first.
- Applying new caulk over old caulk. It may not bond well. Remove loose or failing material first.
- Using regular duct tape on HVAC ducts. It can dry out and fail. Use metal foil HVAC tape rated for the job.
- Covering a gas water heater’s flue, burner, or pressure valve with an insulation blanket. This is a safety hazard. Follow the kit instructions exactly.
- Buying dimmers without checking LED compatibility. Incompatible combinations can flicker or fail early. Look for “dimmable” on the bulb label.
- Skipping the circuit breaker before switch or thermostat work. Turn off the correct breaker and verify with a voltage tester every time.
Weekend Checklist
Work through these roughly in order. The top items are usually the easiest to start with.
- ☐ Check water heater temperature and adjust only if appropriate for your household
- ☐ Test exterior doors and windows for drafts using the paper method
- ☐ Apply weatherstripping to any door that fails the test
- ☐ Add a door sweep to the bottom of exterior doors
- ☐ Caulk visible gaps around exterior window and door trim where appropriate
- ☐ Check your thermostat schedule and make sure it is actually being used
- ☐ Replace old incandescent bulbs with LEDs in your most-used rooms
- ☐ Add a smart plug or switched strip to the TV and console setup
- ☐ Change the HVAC filter and write the date on the new one
- ☐ Check supply and return vents to confirm none are blocked
- ☐ Add faucet aerators to kitchen and bathroom sinks if compatible
- ☐ Check basement rim joists for visible gaps or cold spots
Final Thoughts
The best weekend energy-saving projects are not always the most expensive ones. Often, the biggest first improvement comes from fixing small leaks, using the thermostat properly, improving airflow, and replacing wasteful habits with simple routines.
Start with the safest and easiest tasks first. If a project involves wiring, shared building systems, gas appliances, or anything that feels beyond your skill level, stop and get professional help. Saving energy should never come at the cost of safety.
Common Questions
Which project is best to start with?
Start with door and window drafts, thermostat scheduling, and basic lighting changes. These are easy to understand, low-disruption, and useful in many homes. Results depend on your climate, home condition, and current habits.
Do I need an electrician for a smart thermostat or motion sensor switch?
If you are confident with basic residential wiring and can verify the circuit is off, some thermostat or switch replacements may be manageable. If your home has aluminum wiring, a fuse box, unusual wiring, or anything you do not understand, have a licensed electrician handle it.
Is an insulation blanket safe for all water heater types?
No. For gas water heaters, you must not cover the flue, burner access, or pressure relief valve. Some newer water heaters already have enough built-in insulation. If you are unsure, check the manufacturer’s instructions or ask a qualified technician.
Can renters do most of these projects?
Many small projects are renter-friendly, such as removable weatherstripping, faucet aerators, smart plugs, LED bulbs, and thermal curtains. Smart thermostat installation, switch replacements, caulking, insulation work, and window film may need landlord permission. Always check your lease first.
Should I check for rebates before starting?
Yes. Rebates and incentives can change, and they often depend on your location, utility company, income level, and the exact product you buy. Before spending money on insulation, HVAC equipment, thermostats, or water-heating upgrades, check your local utility website or a trusted energy-efficiency program for current rules.
What if I only have a few hours, not a full weekend?
Check the thermostat schedule, inspect exterior doors for drafts, replace a few frequently used bulbs with LEDs, and add a switched power strip to your TV setup. Save insulation, switch replacements, and HVAC work for a time when you can work carefully.